
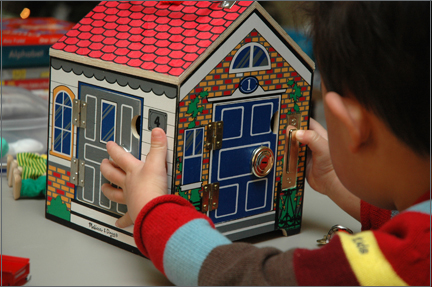
Photo adjusted with my previously limited Photoshop knowledge
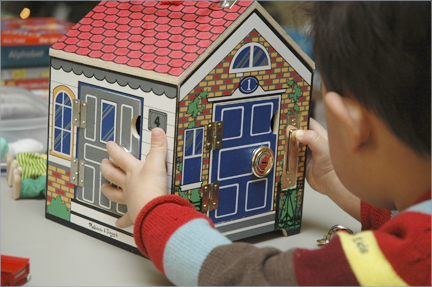
Photo adjusted after reading a couple of chapters of a Photoshop book
I don’t think I could ever just stick my CF card into a printer and push “PRINT”. There’s always something you can do to improve the quality of the photo. That’s what darkrooms are for, after all. You don’t (or the photo “professionals” don’t) just stick the film in the dryer and print from the same setting each time. You create a contact sheet and pick the best exposure from the range. And I know enough about PS to understand that it’s the same kind of tool.
The problem is, I also understand enough about PS to create some major damage. I learned it back in the mid-90s when I had to create slides and overheads at my job and needed to scan and manipulate photos. But I only learned the very, very basic functions of the software. I’ve fiddled around with it a lot since then. Yet I’ve never really had any logic behind the adjustments I was making. I just kept adjusting, hoping to get the result I wanted.
Now that I’m taking this photography thing a lot more seriously, I’ve been feeling frustrated at my results — both with the camera itself and with the post-processing of my photos. I should probably read my book about exposure BEFORE reading my book about Photoshop, but what the hey.
In just two nights of reading, I’ve already found a way to improve several of my underexposed photos. I have to say that my flash (also used without enough knowledge) can create both shadows and blow-outs across the spectrum. The photo above suffered from underexposure. My previous method was to hit Auto Contrast, which often did improve it in a way. But I’m learning about layers and how they can be applied to lighten things up. I even used a technique to soften the grain that was appearing in his skin.
I love the way the second adjustment turned out. Although his hands are a bit too light. But, still, it’s progress. Hooray for higher education!
(In retrospect, I think I lightened the second version a tad too much. Kev, I know you’re going to have an opinion about this, so please do share!)
Which one am I supposed to like better, because I like the first one best 🙂 The more I study photography, the less I like the rules!
Oh, sigh. I KNEW someone would say that. Because the more I look at them, the less sure I am. I have no idea of the rules myself. I’m just trying to figure out how to improve upon my present technique, which works only 30-40% of the time. Maybe this was one of those times! 🙂
I see you’re here from Flickr…thanks for visiting!
Here’s a quick fix…downright fast food-ish actually.
– Switch to Monitor or Mactinosh RBG mode in PS (since your stage is a monitor and not a print).
– Perform an “Auto Levels.” It’ll work on this image. I tested it.
– Now perform an “Undo.” Yes, an “Undo.”
– Take a peek under the “Filter” menu (It’s under “Edit” in PS CS2) and select “Fade Levels.” The “Fade” feature will allow you to apply the last effect used -only in percentages rather than full-strength (aka “full strenff”). Think of this as fine-tuning an effect rather than hitting it full blast every time. Set the percentage to around 40%. Hit “OK” and you’re good.
– If you wanna be cute, hit it with “Unsharp Mask” (Amount 31%, Radius 1.0, and Threshold 0).
– If you really wanna be cute, break out the “Sharpen Tool” on the main tool palette.
– Set the “Sharpen Tool” to a brush size comparable to Devin’s left hand with “Hardness” at 0%. With a “Strength” setting of 30% simply tap the areas of the image where Devin is touching the toy. Don’t go crazy. Just a tap here ‘n there.
– Blam. You’re done. Celebrate. Eat another magazine of Fig Newtons.